When I was a teenager in the 90's "Ice Tea" was really very trendy. Switzerland had discovered this beverage at the end of the 80's, but it was only a few years later that it got extremely popular...
I remember that "Ice Tea" (here, herbal iced teas - peppermint or alpine herbs - are also labeled as "Ice Tea" - not only the black tea or green tea versions) was the only thing that kids drank (together with Coke, of course - I never loved that drink though) and I was no exception to the rule. At home, we stocked gallons of that beverage (bought in Migros only - my favorite brand). If all cartons disappeared and no "Ice Tea" was left, then you could have been sure that I would make real tantrum. My worst nightmare (LOL). I was so addicted to it that I could not drink anything else. Of course, ingesting so much sugar (so many calories) on a daily basis cannot be good for your body and I believe it is one of the reasons (this and eating a little too well) why I got a little "stocky" (baby fat) when I was 16-18 years old (thankfully it is not the case now anymore, phew).
At this time, certain countries like France or England didn't know what commercial "Ice Tea" was. Once, in Annecy, at a tea room I ordered an "Ice Tea" naively thinking that they were going to get it out of either a carton or a bottle, but to my big surprise the waiter looked at me with big suprised eyes as if I had asked for the most exotic of drinks! He asked me what I meant and I explained what it was. So after a while he came back with a freshly brewed glass of "Ice Tea" that the bartender had made specially for me. It was the most delightful "Ice Tea"I ever had. They had even added a ball of homemade lemon sorbet to it. Fantastic! This little adventure still makes me laugh...
My love for "Ice Tea" has not died, but my I am no longer a fan of the bought kind and I drink lots of water now. My tastes have changed since I have grown older. Industrial "Ice Tea" does not please me anymore. I find it far too sweet, bland, unhealthy and chemical. As my grownup tastebuds demand quality foods, I resolved myself to making my own "Ice Tea". In that way, all my needs and craving can be fulfilled.
After having tested different brands of black teas, I have come to the conclusion that the best one to use when preparing "Ice Tea" is Lipton. Although it is far from being my favorite black tea for making a good cuppa (Twinnings or Palais des Thés black teas are far better as they have more character and are more complex - a totally different class of teas), Lipton "Yellow Label" is perfect when used for making "Ice Tea" as it's not too strong and has light aromas.
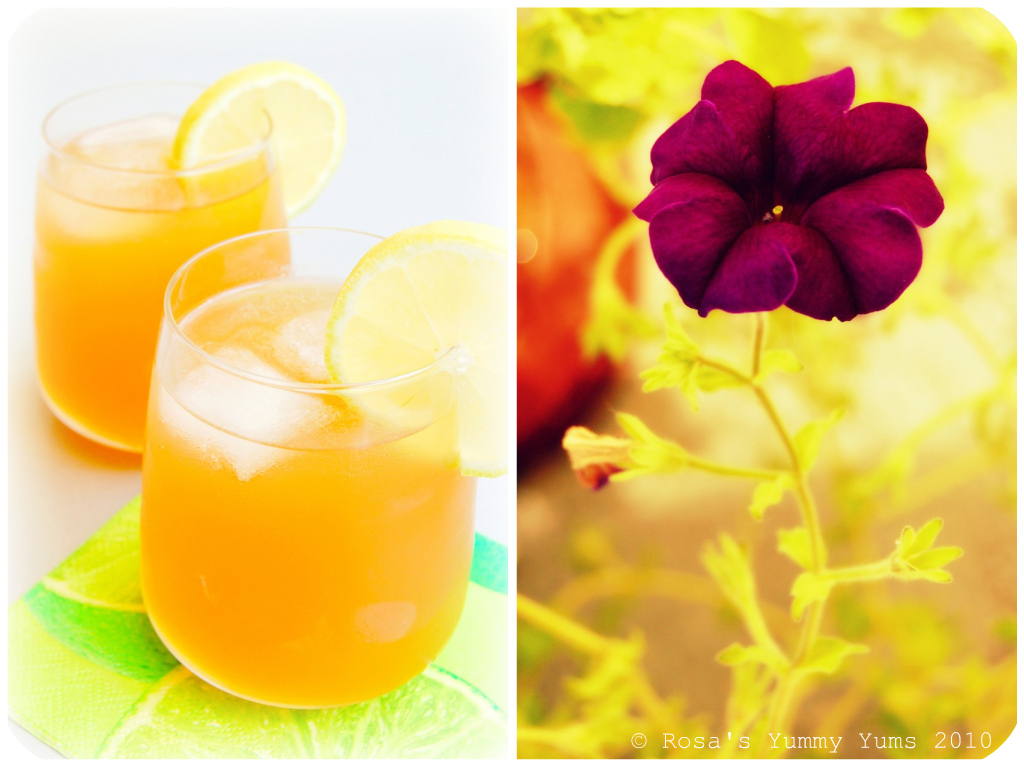
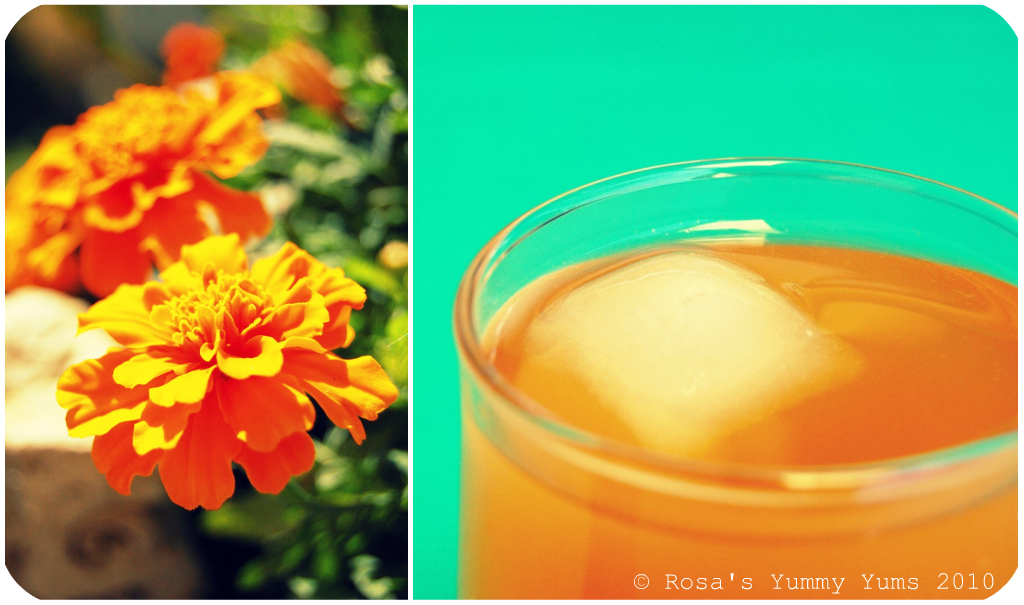
I always use a lot of lemon juice and rind to add some character to the brew which would be too boring without that gorgeous citrusy touch. Then I sweeten it with a little light brown sugar and light runny honey in order to give more deepness to my "Ice Tea". Finally, I always integrate a little lemon essence to that drink as it brings an extra lemony kick and freshness to it.
The recipe I am posting today is mine. I tested many different variations and experimented a lot before I found that perfect combination. My "Ice Tea" is neither too sweet, to strong nor insipid. The acidity of the lemons counterbalances wonderfully the sugariness of the sugar and honey, and the exhalirating fragrance of the essence just lifts up the whole flavor in a delightful way. So refreshing and delicious!
Recipe by Rosa @ Rosa's Yummy Yums 2010.
Makes about 2.8 litres ice tea.
Ingredients:3 Bags Black tea (I used Lipton "Yellow Label")2.6 Litres Water220-240ml Lemon juice (organic/about 2 lemons)The zest of 1 Organic lemon5 Tbs Light brown sugar4 Tbs Runny Honey1/3 Tsp Natural lemon essence
Method:1. Heat water in a big pan and bring to a light boil.2. Add the tea bags and let infuse for about 8-10 minutes, then dispose of the bags.3. Add the rind of one lemon, the sugar, honey and essence. Stir well until the honey and sugar are dissolved.4. Let cool completely.5. Sieve the preparation.6. Put the jugs in the fridge for at least 2-3 hours or until cold.7. Serve.
Remarks:Don't let the tea infuse for too long or the ice tea will have a bitter taste.If you find that the ice tea is not sweet enough, then feel free to add a little more sugar or if it is too sweet then add a little water.
Serving suggestions:Serve at any time of the day or night with ice cubes and slices of lemon or add a ball lemon sorbet to the ice tea.
~~~~~~~~~~~~~~~~~~~~~~
~ THÉ FROID US ~
Recette par Rosa @ Rosa's Yummy Yums 2010.
Pour environ 2.8 litres de thé froid.
Ingrédients:3 Sachets de thé noir (j'ai utilisé du Lipton "Yellow Label")2.6 Litres d'Eau220-240ml de Jus de citron bios (~2 citrons)
Le zeste d'un citron bio5 CS de Sucre brun clair4 CS de Miel liquide1/3 CC d'Extrait naturel de citron
Méthode:1. Porter l'eau à ébullition (petit bouillons).2. Ajouter les sachets de thé et laisser infuser 8 à 10 minutes, puis retirer les sachets.3. Ajouter le zeste, le jus de citron, le sucre, le miel et l'extrait de citron. Bien mélanger afin que le sucre et le miel soient dissouts.4. Laisser refroidir complètement.5. Passer au tamis.6. Transférer dans un pot et mettre au frigo au moins 2 à 3 heures ou jusqu'à ce que le thé froid soit froid.7. Servir.
Remarques:Ne laissez pas le thé infuser trop longtemps autrement votre thé froid aura un goût amer.
Si vous trouvez que le thé n'est pas assez sucré alors vous pouvez ajouter soit du sucre ou du miel et si, au contraire, vous le trouvez trop sucré, alors ajoutez un peu d'eau.
Idées de présentation:Servir ce thé froid à n'importe quelle heure de la journée ou de la nuit avec des glaçons et une tranche de citron ou avec une boule de sorbet au citron.
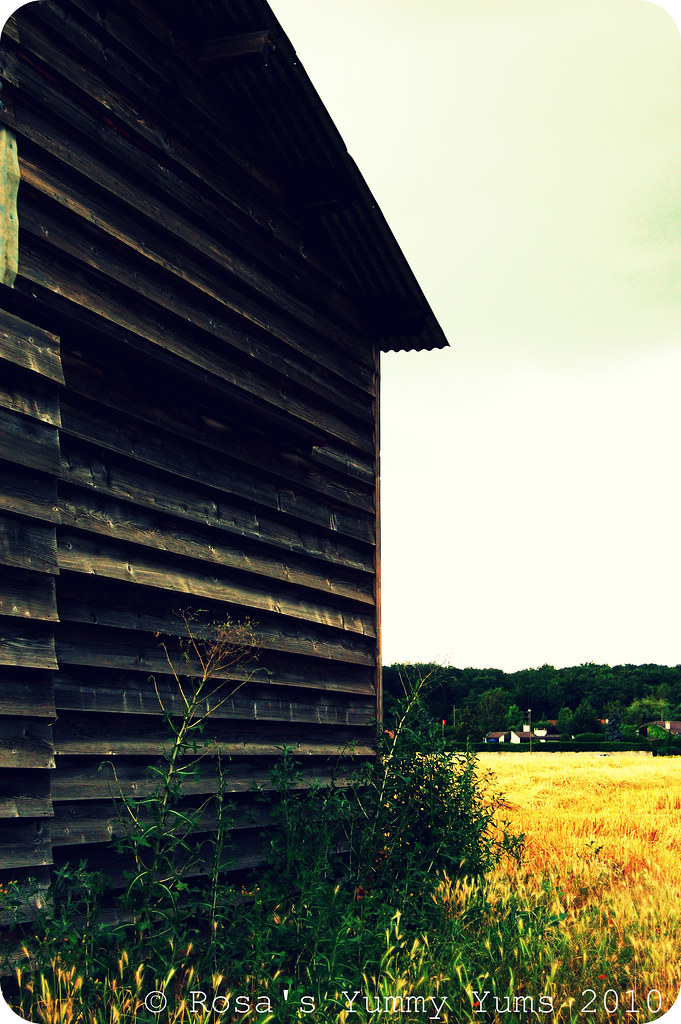
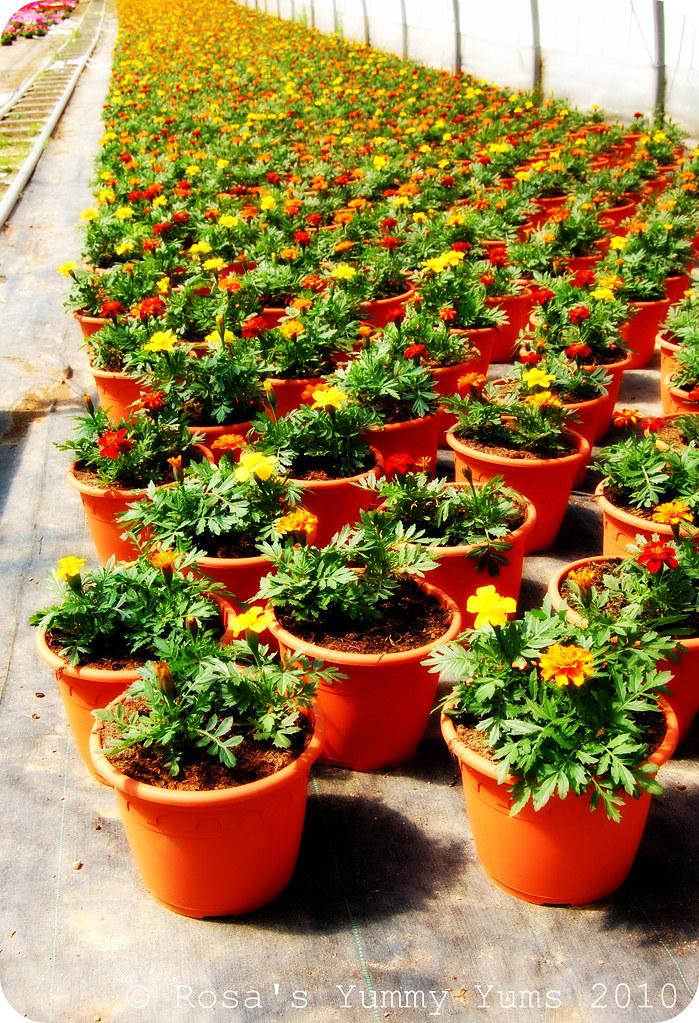
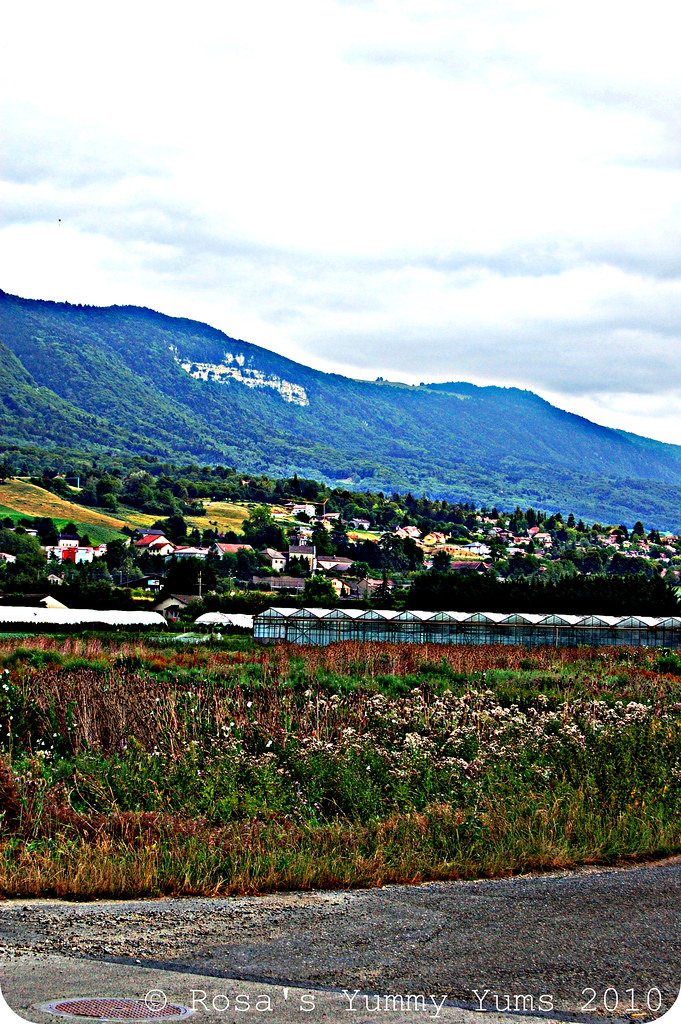
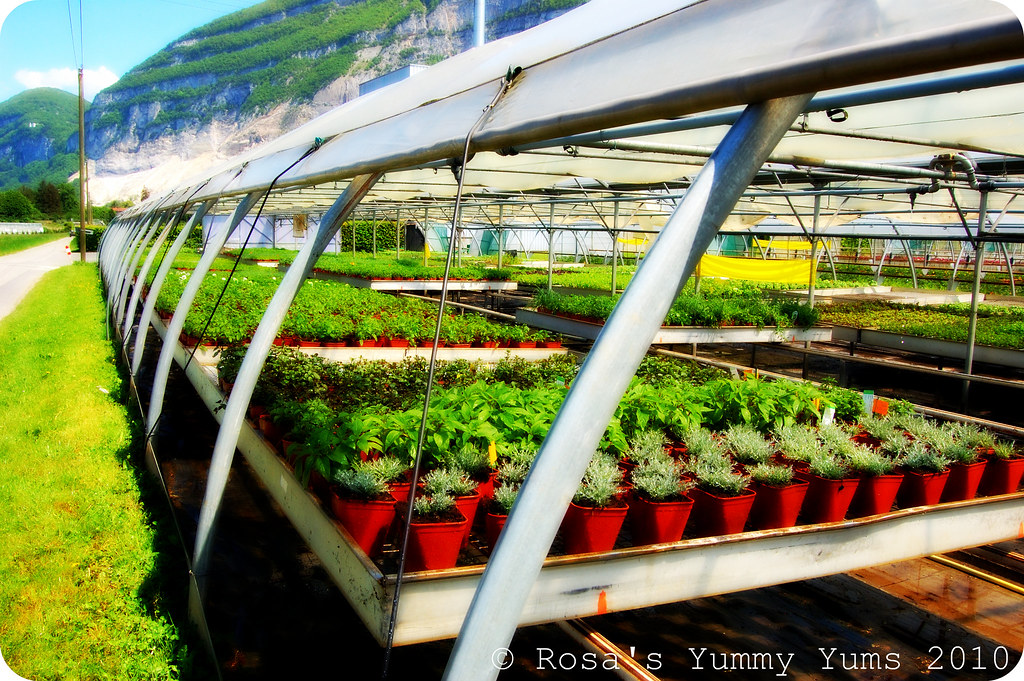
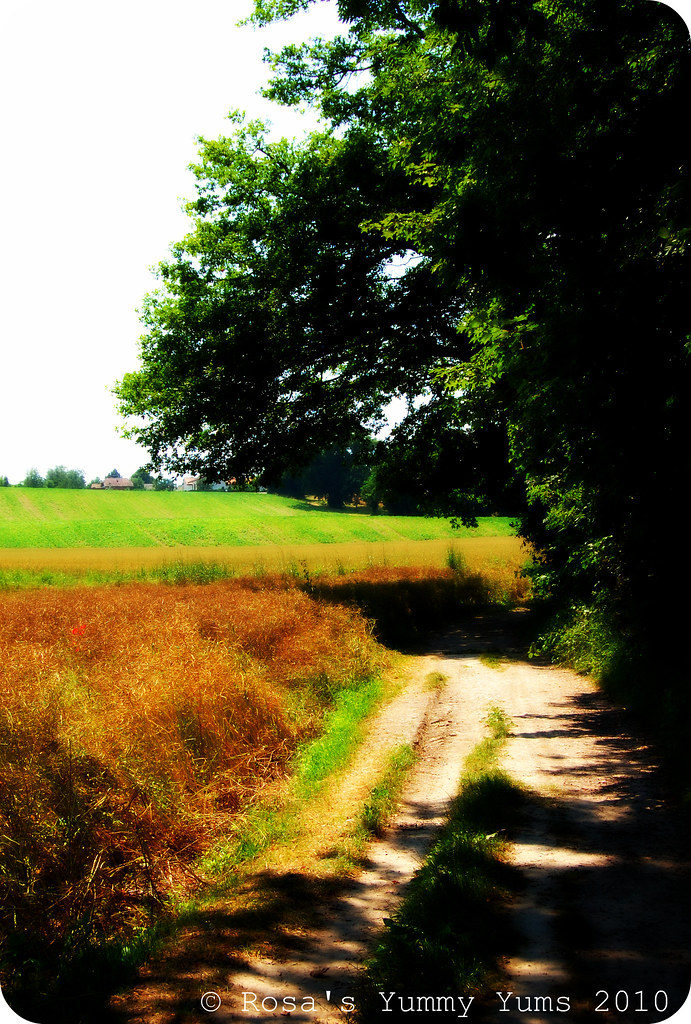
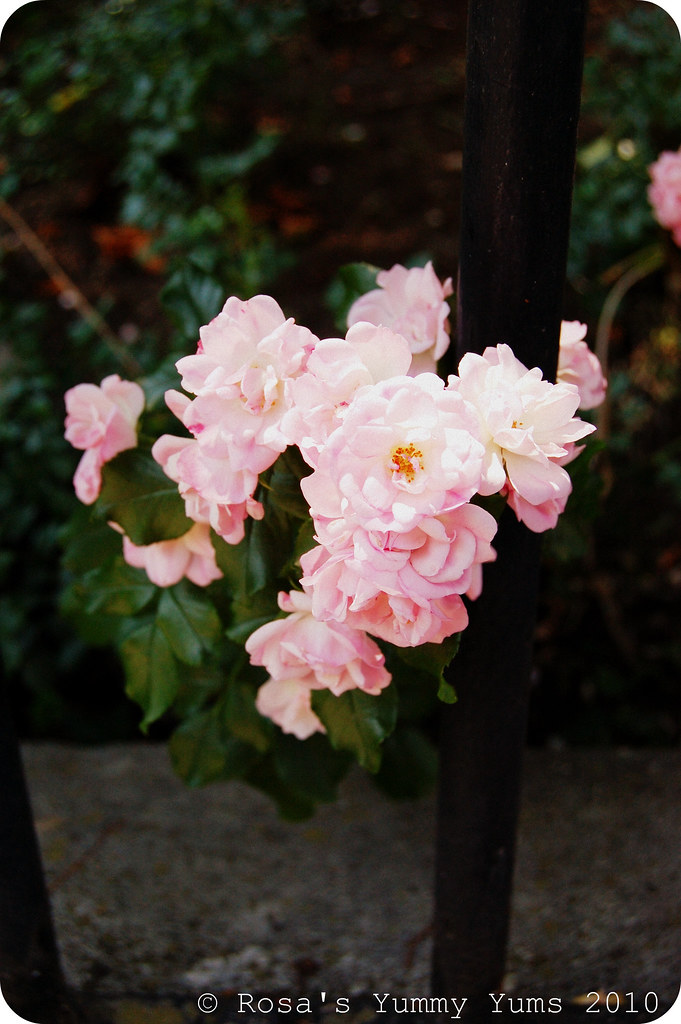
This week, I am continuing to show you the beautiful countryside that lies all around our village. There is so much to see and discover in that area of Geneva...This part of the canton is dedicated to agriculture. Around Veyrier and Troinex you'll find vineyards, fields (wheat, corn, quinoa, etc), big greenhouses (which are used for growing, fruits, vegetables, herbs and plants). Most of the regional products which you can buy in local supermarkets come from there.Enjoy the tour!
Here I am blogging about my latest Daring Bakers challenge and being once again awestruck by the way time flows. I feel as if I posted that "Chocolate Pavlovas" recipe less than a week ago. Days seems to slip through my fingers without giving me the chance to get a grip on them! No wonder I always start baking my Daring Bakers creations just before the deadline...
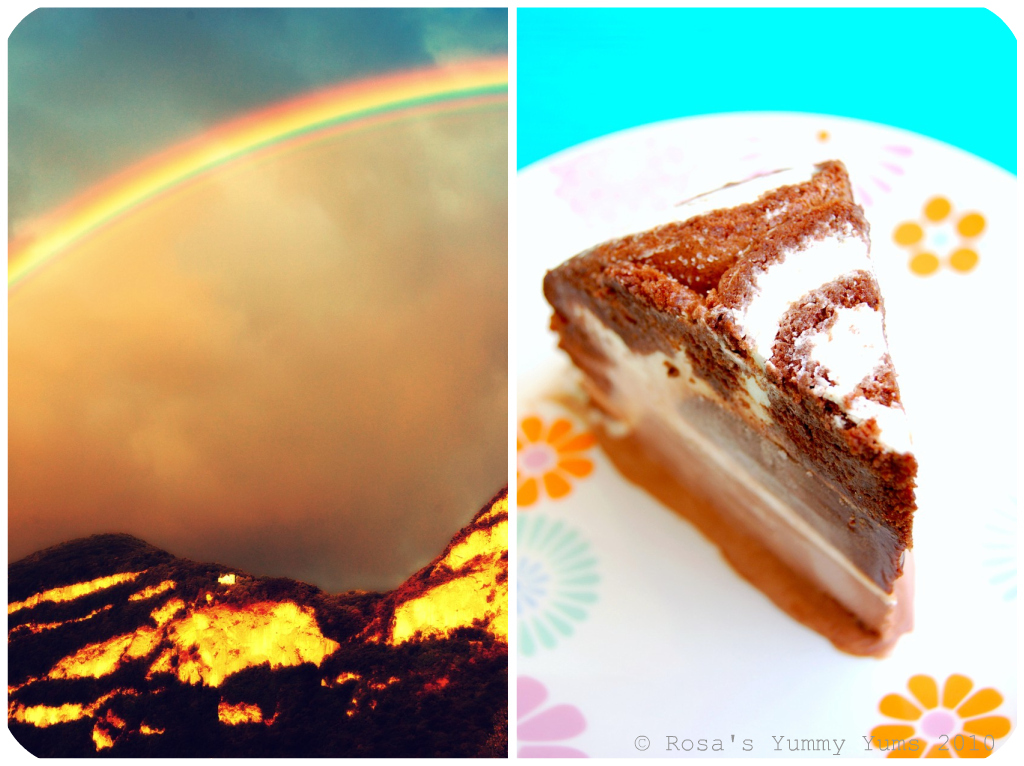
The July 2010 Daring Bakers’ challenge was hosted by Sunita of "Sunita’s World – Life And Food" who challenged everyone to make an ice-cream filled Swiss roll that’s then used to make a "Bombe" with hot fudge. Her recipe is based on a n ice cream cake recipe from Taste of Home.
Making a "Bombe Glacée" (an ice cream dessert frozen in a spherical mould that appears on restaurant menus since 1882) was not much of a challenge in itself. The process, although long and fastidious was not that complicated. Swiss rolls (or Jelly Rolls) are easier to bake than they seem (it was either not the first time the I made this speciality) and the ice cream as well as hot fudge recipes used are very simple (no custard base for the ice creams) to prepare. Although my baking skills were not put to the test, my patience was grandly put to trial.
Since we were under a heatwave it was extremely annoying to have to work with ice cream as it took hours to freeze and melted every time I got it out of the freezer. And to crown the heat problems, making space in the freezer was a real brainteaser (it is so full that I cannot even add a nut!). Then, as if it was not enough, the "Swiss Roll Ice Cream Cake" was a heck of a pain in the backside to photograph due to it's lack of photogeny. I somehow find there was a little too much whipped cream in each roll so when I placed the cut slices in the bowl and had to "squish" them slightly in order to make them fit in their mould, the filling spilled out and made a mess. Hence the not so neat exterior of my "Bombe" (a real nightmare for a perfectionist like me).
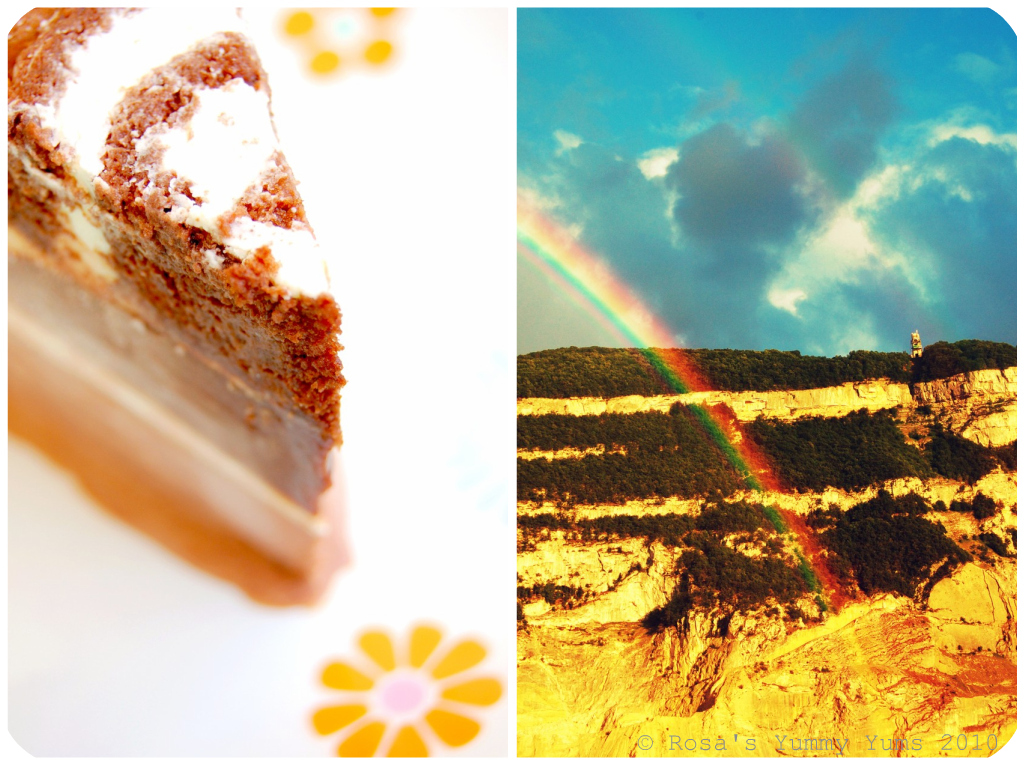
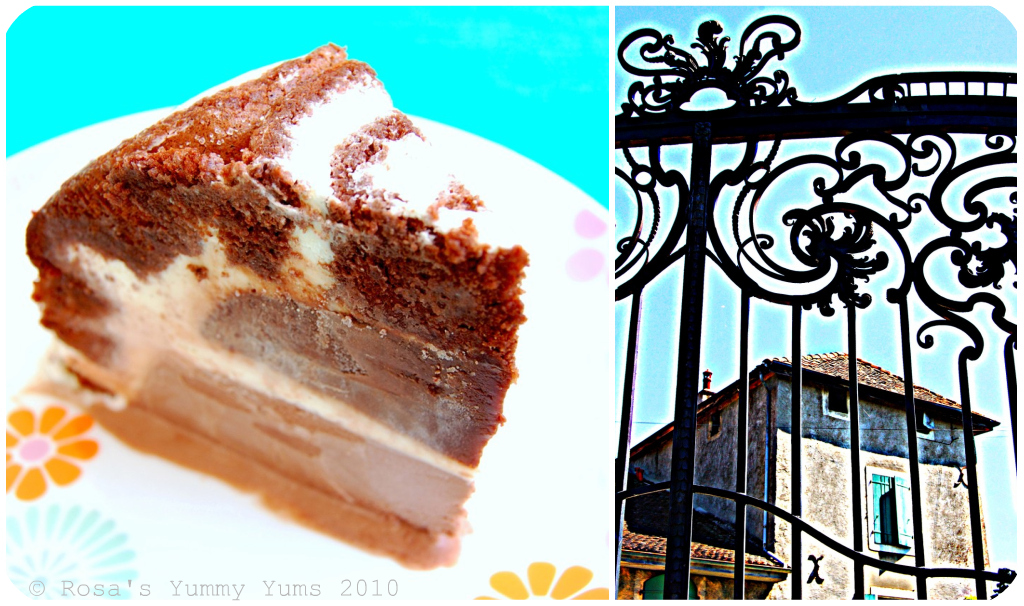
Anyway, the whole process went well no matter if I had to fight against the high temperatures that Mother Nature delivered or my overfull freezer. My "Swiss Roll ice Cream Cake" turned out to look not all that bad and was very enjoyable. I really loved that delightful chocolaty flavor it had, but was not so keen on the fudge filling which somehow had a kind of cardboardy flavor (I only used good Swiss Cailler cocoa, so it could not have been at the origin of it's dull taste). I used a little Kirsch to perfume the vanilla ice cream, thus adding some complexity and a lovely aroma to the dessert. This "Swiss Roll Ice Cream Cake" was so successful that it took us (my boyfriend and I) no more than three eating sessions to finish it completely!
I wish to thanks Sunita for having chosen that wonderful dessert. This recipe is so good that I'll have to make it again some day!
~ Swiss Roll Ice Cream Cake ~
Inspired by the recipe of the same name from the Taste of Home website.Preparation time:. For the 2 Swiss rolls - 30 mins each + cooling time (at least 30 minutes) before filling and rolling.. The filling can be made while the cakes cool.. For the ice creams - 5+10 minutes + freezing time. For the fudge topping - 5 minutes + cooling time. Assembly - At least an hour of freezing time between each layer (I took much more)
Equipment required:
A large mixing bowlSpatula/mixing spoonSieveA small saucepanContainers for ice creamsCling film/plastic wrap
Greaseproof baking paper
Food processor/grinderElectric/hand held beaters
Whisk 2 Baking pans, 11 inches by 9 inches eachKitchen towelsCooling rack
A pudding bowl/any other bowl, pan in which you are going to set the dessert. I used a 2 litre capacity, 9 inches in diameter and 4 inches deep.FreezerOvenServing plateKnife
~~~~~~~~~~~~~~~~~~~~~~
SWISS ROLLS
Preparation time - 10 minutesBaking time- 10-12 minutesRolling and cooling time- at least 30 minutesFilling-5-8 minutesFilling and rolling- 5-10 minutes
Ingredients for the "Cake":
6 Medium sized Eggs1 Cup (225g/8 oz) Caster sugar + extra for rolling6 Tbs (45g/a pinch over 1.5 oz) All purpose (plain) flour5 Tbs (40g/a pinch under 1.5 oz) Natural unsweetened cocoa powder, sifted together with the flour2 Tbs (30ml/1 fl oz) Boiling waterA little oil for brushing the pansIngredients for the "Filling":2 Cups (500ml/16 fl oz) Whipping cream (35% fat)1 Vanilla pod, cut into small pieces of about 1/2 cm (or 1 Tsp pure vanilla extract)5 Tbs (70g/2.5 oz) Caster sugar
Method For The "Cake":
1. Preheat the oven at 200° C (400° F) approximately. Brush the baking pans (28 x 23 cm/11 inches by 9 inches) with a little oil and line with greaseproof baking paper (if you have just one pan, bake one cake and then let the pan cool completely before using it for the next cake).
2. In a large mixing bowl, add the eggs and sugar and beat till very thick (when the beaters are lifted, it should leave a trail on the surface for at least 10 seconds). Add the flour mixture, in three batches and fold in gently with a spatula. Fold in the water.3. Divide the mixture among the two baking pans and spread it out evenly, into the corners of the pans.4. Place a pan in the centre of the preheated oven and bake for about 10-12 minutes or till the centre is springy to the touch.
5. Spread a kitchen towel on the counter and sprinkle a little caster sugar over it.
6. Turn the cake on to the towel and peel away the baking paper. Trim any crisp edges. Starting from one of the shorter sides, start to make a roll with the towel going inside. Cool the wrapped roll on a rack, seam side down.7. Repeat the same for the next cake as well.
Method for the "Filling":1. Grind together the vanilla pieces and sugar in a food processer till nicely mixed together (if you are using vanilla extract, just grind the sugar on its own and then add the sugar and extract to the cream).2. In a large bowl, add the cream and vanilla-sugar mixture and beat till very thick.3. Divide the cream mixture between the completely cooled cakes.4. Open the rolls and spread the cream mixture, making sure it does not go right to the edges (a border of 1/2 an inch should be fine).5. In a large bowl, add the cream and vanilla-sugar mixture and beat till very thick. Roll the cakes up again, this time without the towel. Wrap in plastic wrap and chill in the fridge till needed, seam side down.
~~~~~~~~~~~~~~~~~~~~~~
VANILLA ICE CREAMPreparation time - 5 minutes+freezing (I have made the ice cream without an ice cream maker).
Ingredients:2 and 1/2 Cups (625ml/20 fl oz) Whipping cream1 Vanilla bean, minced or 1 Tsp (5ml/0.15 fl oz Pure vanilla extract)1/2 Cup (115g/4oz) Granulated sugar1 1/2 Tbs Kirsch
Method:1. Grind together the sugar and vanilla in a food processor. In a mixing bowl, add the cream, kirsch and vanilla-sugar mixture and whisk lightly till everything is mixed together (if you are using the vanilla extract, grind the sugar on its own and then and the sugar along with the vanilla extract to the cream).2. Pour into a freezer friendly container and freeze till firm around the edges.
3. Remove from the freezer, beat till smooth and return to the freezer (do this 3-4 times and then set completely).
~~~~~~~~~~~~~~~~~~~~~~
HOT FUDGE SAUCE
Preparation time - 2 minutesCooking time-2 minutesPreparation time - 2 minutesCooking time-2 minutesMake this just after adding the layer of vanilla ice cream to the cake.
Ingredients:1 Cup (230g/8oz) Caster sugar3 Tbs (24g/1.5 oz) Natural unsweetened cocoa powder2 Tbs (15g/1 oz) Cornstarch1 1/2 Cups (355ml/12 fl oz) water1 Tbs (14g/1 oz) Unsalted butter1 Tsp (5 ml/0.15 fl oz) Pure vanilla extract
Method:
1. In a small saucepan, whisk together the sugar, cocoa powder, cornflour and water.
2. Place the pan over heat, and stir constantly, till it begins to thicken and is smooth (for about 2 minutes).
3. Remove from heat and mix in the butter and vanilla. Keep aside to cool .~~~~~~~~~~~~~~~~~~~~~~
CHOCOLATE ICE CREAMPreparation time - 5 minutes + freezing
Ingredients:
2 Cups (500ml) Whipping cream (35% fat)1 Cup (230g/8 oz) Caster sugar3 Tbs (24g/1.5 oz) Natural unsweetened cocoa powder
Method:
1. Grind together the sugar and the cocoa powder in a food processor.2. In a saucepan, add all the ingredients and whisk lightly.
3. Place the pan over heat and keep stirring till it begins to bubble around the edges.4. Remove from heat and cool completely before transferring to a freezer friendly container till firm around the edges (if you are using an ice cream maker, churn the ice cream according to the manufacturer’s instruction, after the mixture has cooled completely).5. Remove from the freezer, beat till smooth and return to the freezer (do this 3-4 times and then set completely).
~~~~~~~~~~~~~~~~~~~~~~
ASSEMBLING THE ICE CREAM CAKE
Method:
1. Cut the Swiss rolls into 20 equal slices (approximately 2 cms each).
2. Cover the bottom and sides of the bowl in which you are going to set the dessert with cling film/plastic wrap.3. Arrange two slices at the bottom of the pan, with their seam sides facing each other. Arrange the Swiss roll slices up the bowl, with the se am sides facing away from the bottom, to cover the sides of the bowl. Cover the bowl wi th plastic wrap and freeze till the slices are firm (at least 30 minutes).
4. Soften the vanilla ice cream. Take the bowl out of the freezer, remove the cling film cover and add the ice cream on top of the cake slices. Spread it out to cover the bottom and sides of the bowl. Cover the bowl with plastic wrap and freeze till firm (at least 1 hour).5. Add the fudge sauce over the vanilla ice cream, cover and freeze till firm (at least an hour).6. Soften the chocolate ice cream and spread it over the fudge sauce. Cover with plastic wrap and freeze for at least 4-5 hours till completely set .7. Remove the plastic cover, and place the serving plate on top of the bowl. Turn it upside down and remove the bowl and the plastic lining (if the bowl does not come away easily, wipe the outsides of the bowl with a kitchen towel dampened with hot water - the bowl will come away easily).
8. Keep the cake out of the freezer for at least 10 minutes before slicing, depending on how hot your region is. Slice with a sharp knife, dipped in hot water.
~~~~~~~~~~~~~~~~~~~~~~
Etant donné la longueur du texte original, je n'ai malheureusement pas pu faire une traduction française de ce billet et je m'en excuse auprès de tous mes amis lecteurs et blogueurs francophones!C'est pourquoi je vous suggère de vous rendre sur le blog mentionné ci-dessous. Vous y trouverez cette recette en version française.Chez Isa de "Les Gourmandises d'Isa" (Canada)Chez Vibi de "La Casserole Carrée" (Canada)
This week, Nikita Cat at "Meowsing Of An Opiniated Cat" (USA) are happy to announce that she is hosting Weekend Cat Blogging #268...
To submit your kitty picture(s), you can either leave a message in her blog's comment section (with your permalinks) or contact her via e-mail without forgetting to give all the needed information.
 Although Friday is my usual recipe day, today I will not be posting any. But don't worry on Tuesday the 27th of July I will blog about the latest Daring Bakers challenge.
Have a good weekend!
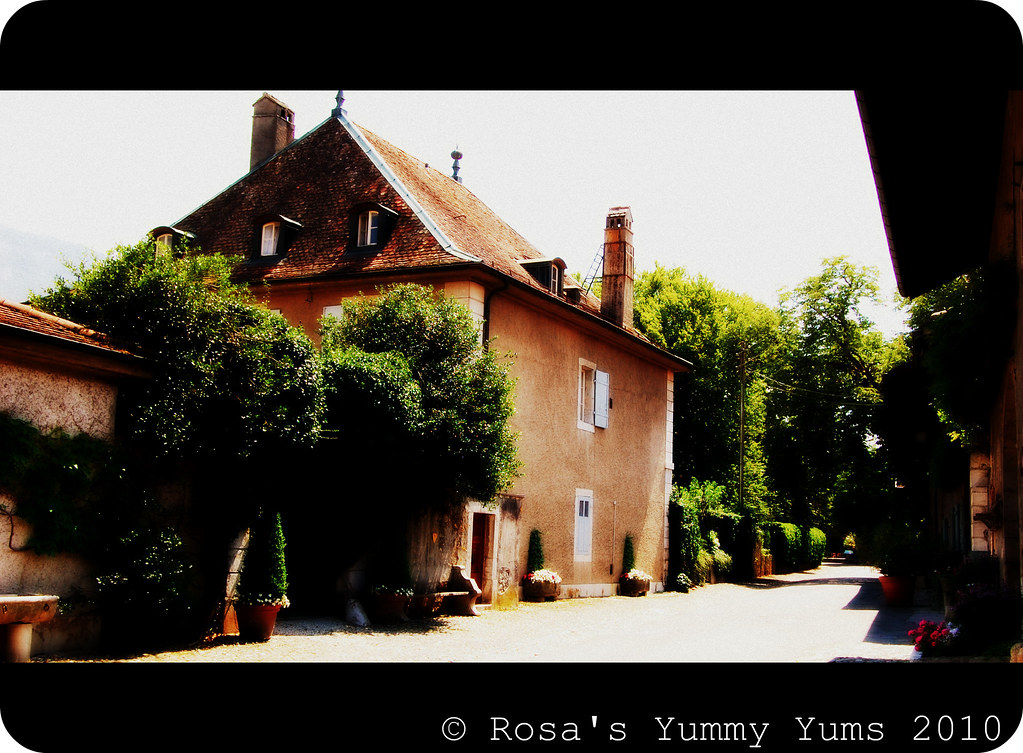
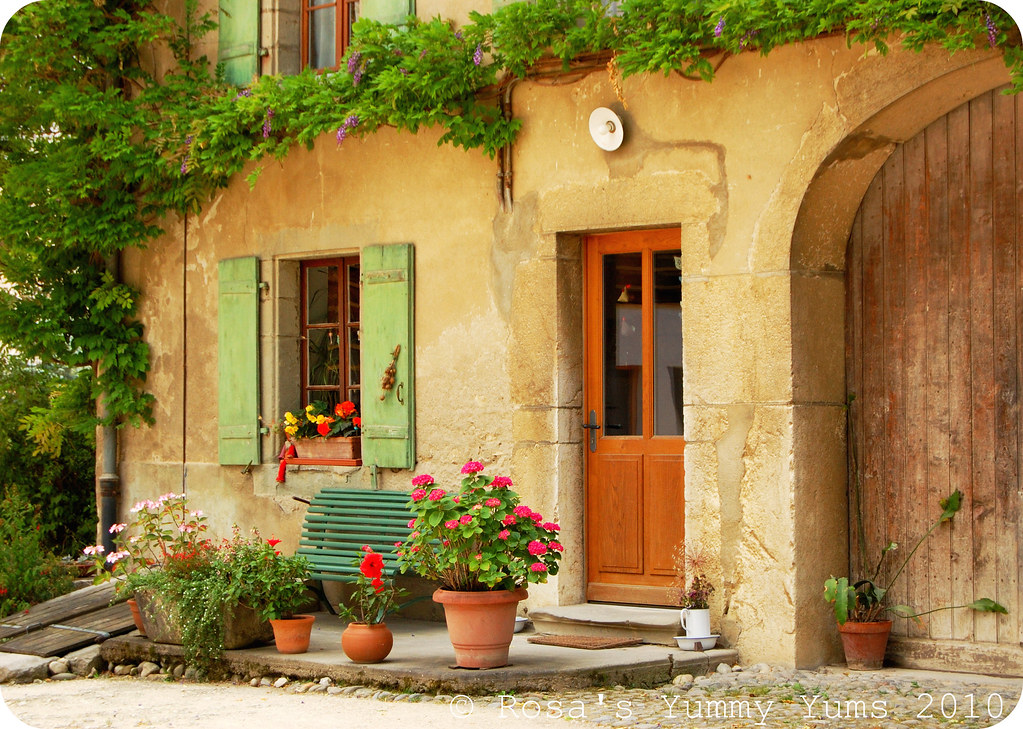
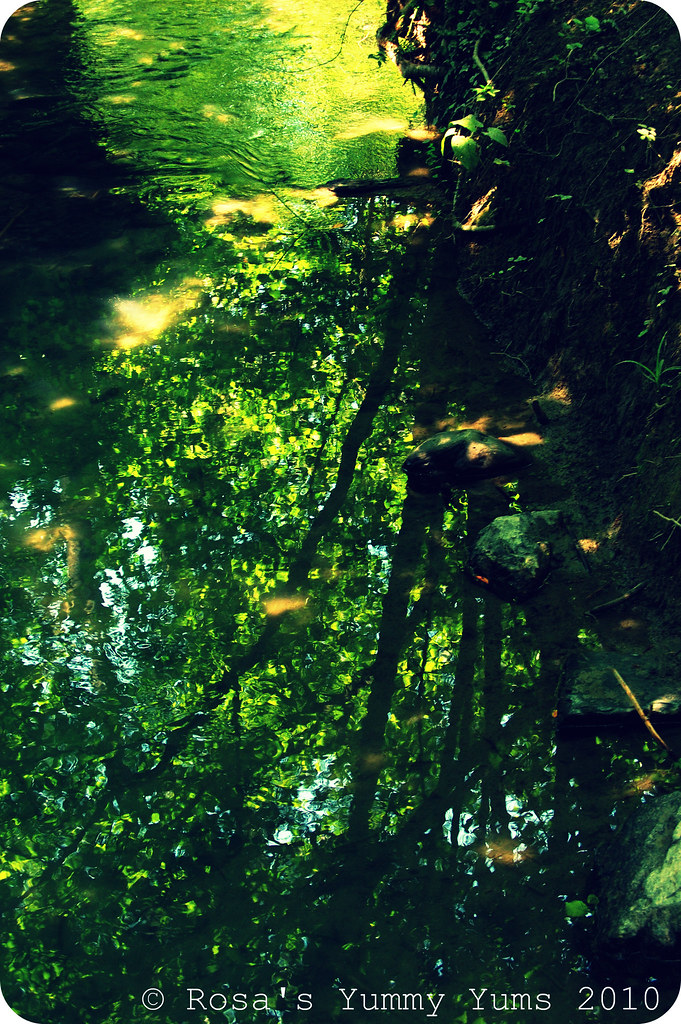
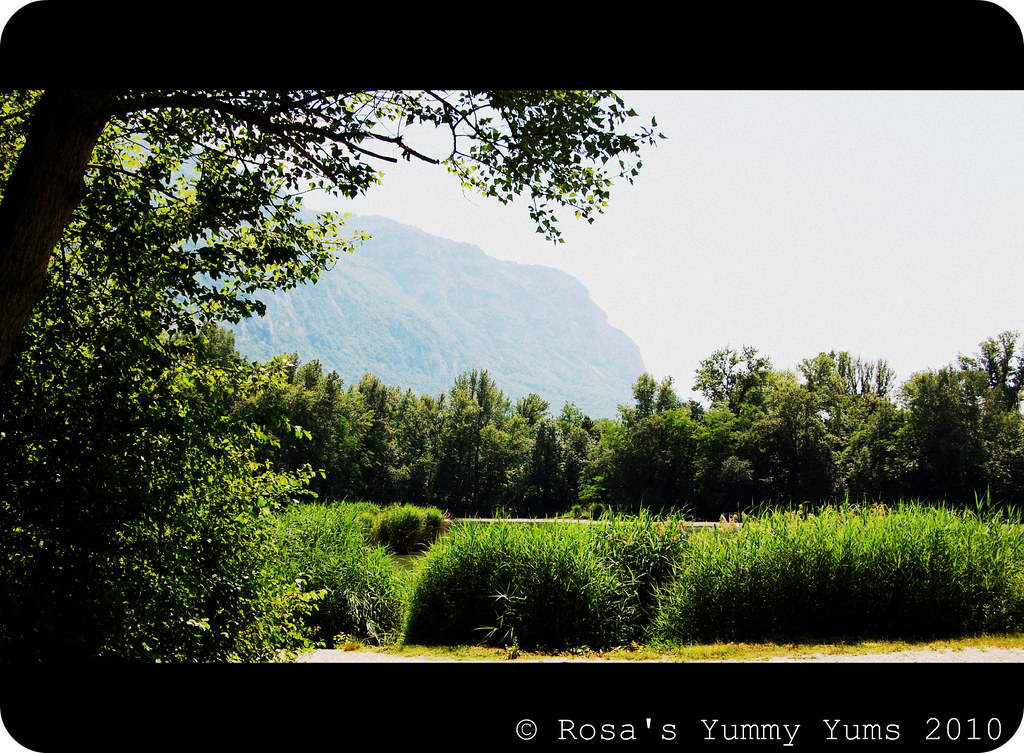
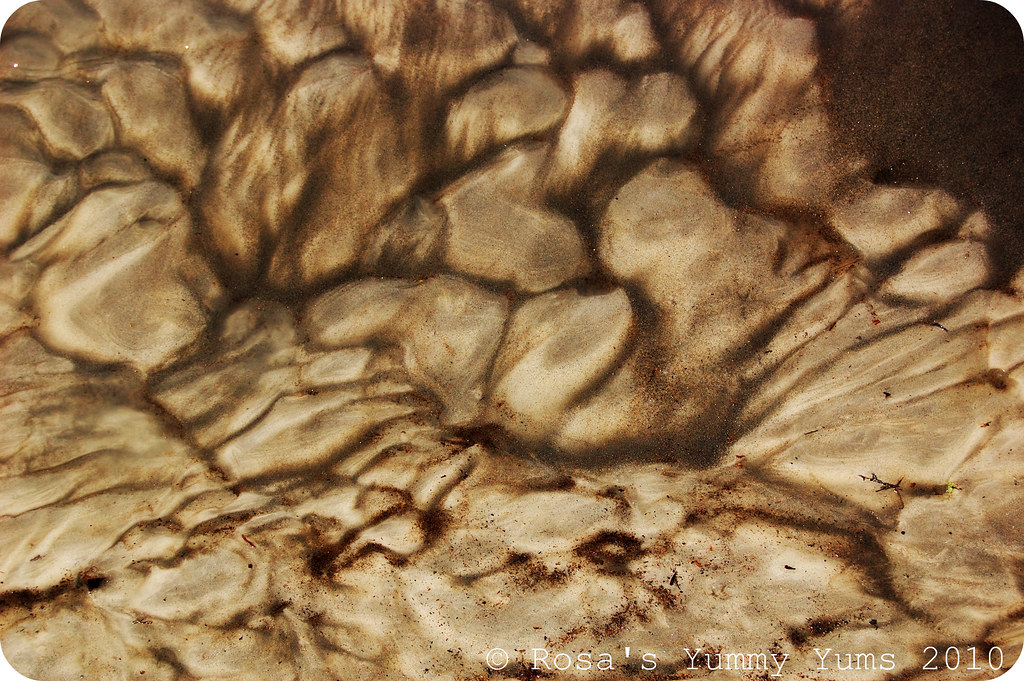
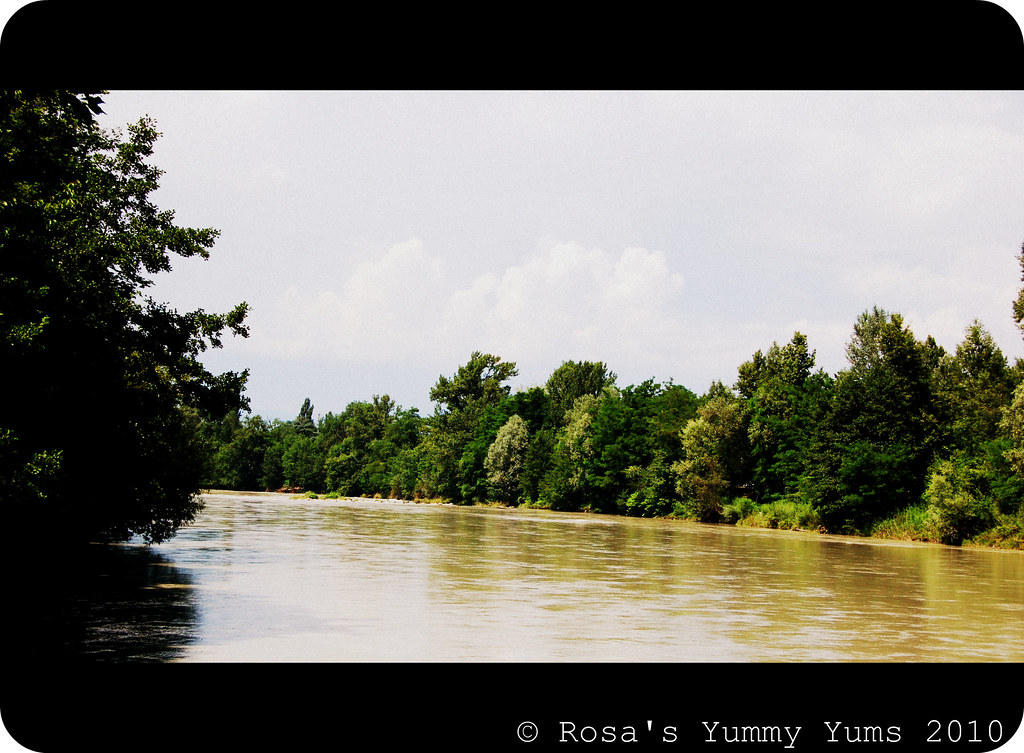
Last week I talked about my walk by the Arve riverside. In this post you'll be able to see the pictures of the second part of my little trip...Well, after having crossed the French border and enjoyed the wonderful scenery there (Arve river & Étrembière pond) we continued hiking in the direction of the quaint hamlet of Sierne with it's historic farmsteads (some dating back to Medieval times) and vineyards.
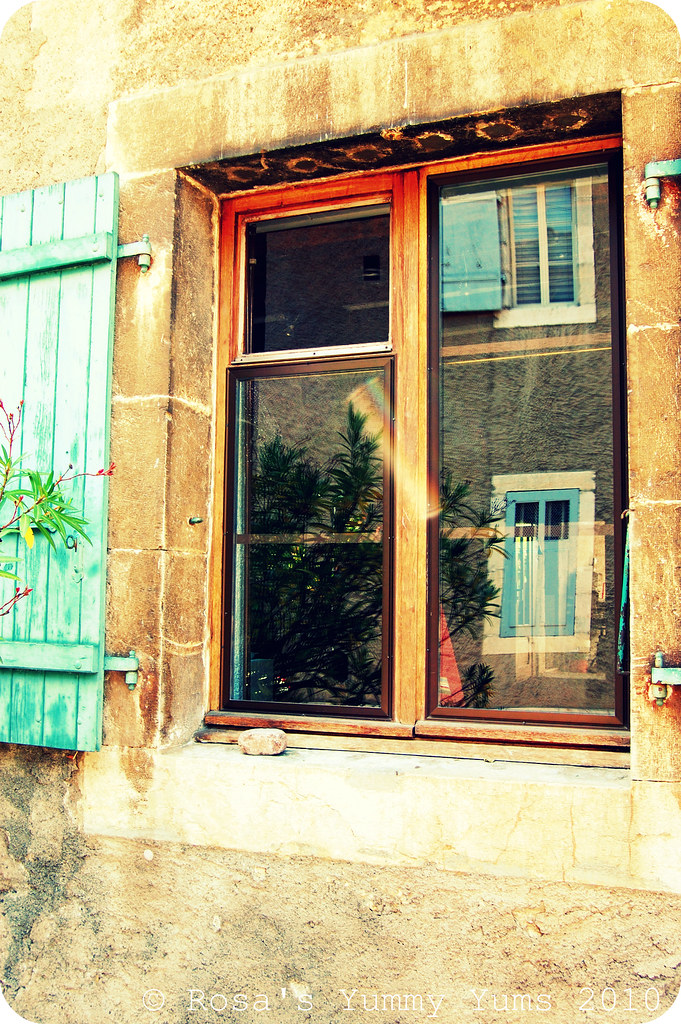
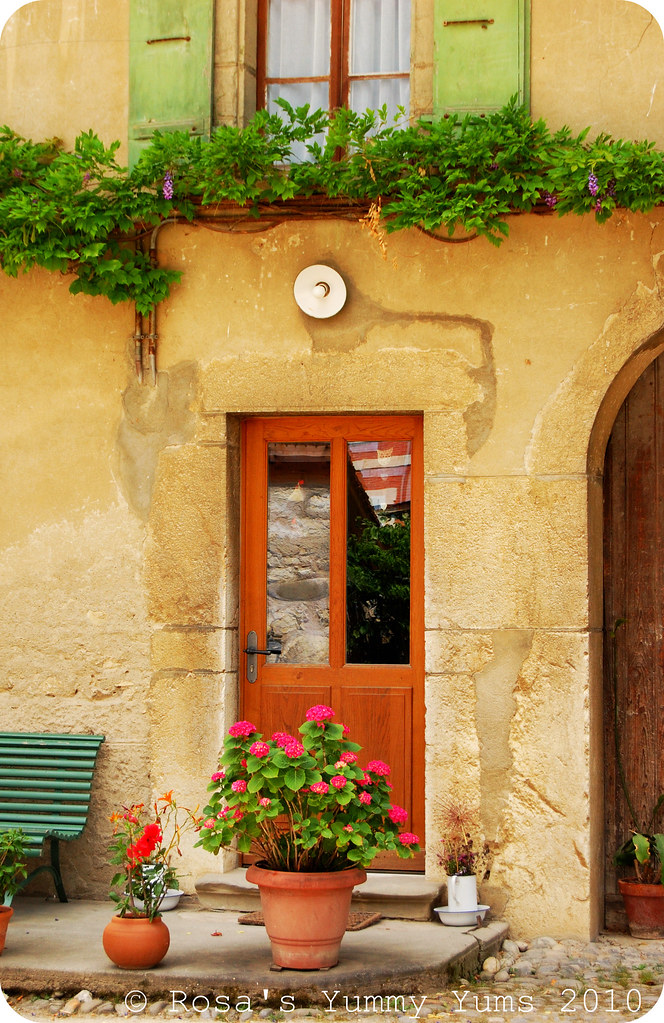
It is a magical place chock-a-block-full with atmosphere and interesting details. No wonder that it is considered to be one of the most beautiful hamlets in the canton of Geneva. A paradize for fans of old buildings and for photography freaks!
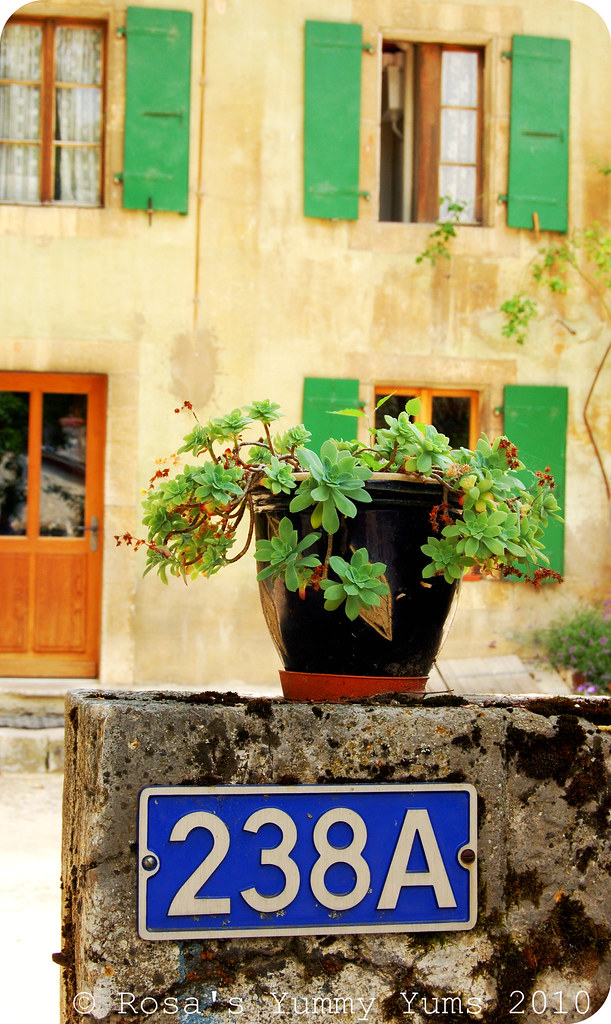
Then, after having gone through Sierne we headed toward the Route de Veyrier where there is a lovely farmhouse which I never forget to admire. A ravishing home that brings you back in time. My favorite place in Geneva.
I hope that you'll feel the magic of that part of the Geneva countryside and that my photos will make you dream.
This week, we remember foodblogger and cat lover Sher who passed away 2 years ago. We all still miss her very much...
Salome at "Paulchen's Foodblog" (Austria) is hosting Weekend Cat Blogging #267. To submit your kitty picture(s), you can either leave a message in her blog's comment section (with your permalinks) or contact her via e-mail without forgetting to give all the needed information.
Being under an intense heatwave at the moment I try to put on the oven only when it is really compulsory (to bake breads for the weekend or fruit tarts about once a week). Our meals consist generally of lots of raw vegetables (salads, gazpachos, dips, etc...), stir fried dishes, easy and quick pasta dishes, lots of legumes (white beans, chickpeas, lentils, etc...) and cereals (müeslis, farro, bulghur, etc..). Considering the fact that heat cuts my appetite all I want to eat are light dishes and for that reason, fresh and healthy food is what I crave when the temperatures are extremely high (33°-36° C/91°-97° F)...
Summer vegetables are wonderful and so versatile. They can be prepared in so many different manners (raw, steamed, stir fried, grilled & baked) and taste really good. There is a great amount of dishes that one can prepare during the sunny season. If, like me, you love the Middle Eastern, Mediterranean and Asian cusines, then it is the time of the year when you can fulfill all your exotic cooking dreams as well as fantasies.
If I emphasize on buying seasonal fruits and vegetables it is because I want my food to be as free of chemicals as possible, rich in flavor and don't want to participate in polluting the earth more that it is already . It is for that reason that I am never bored with what I eat as I look forward to the change of seasons, thus to variation in my diet. Every season brings it's share of amazing products. I would not want to eat the same all year long. I enjoy the longing for renewal and novelty.
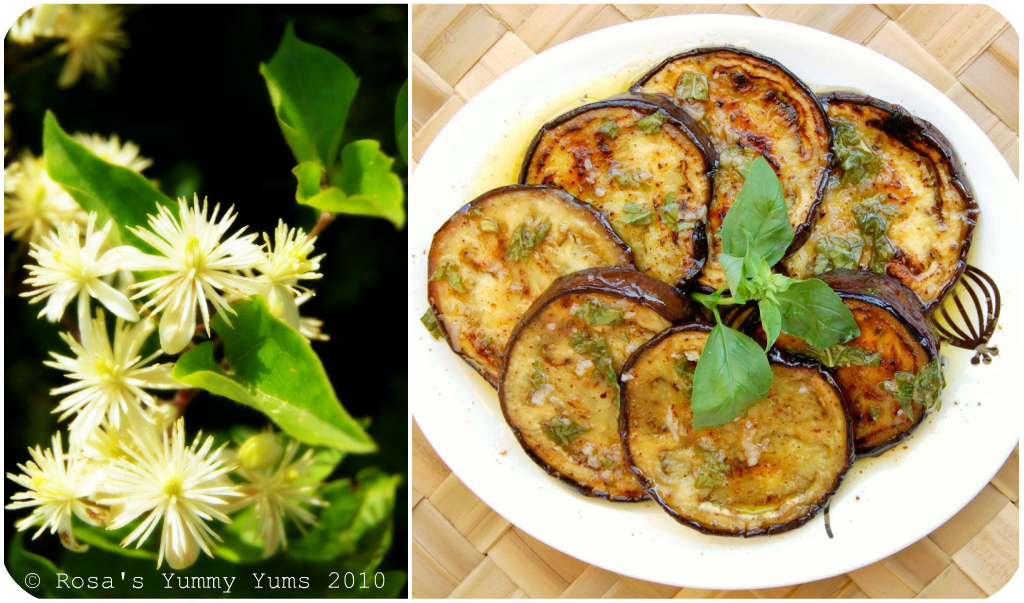
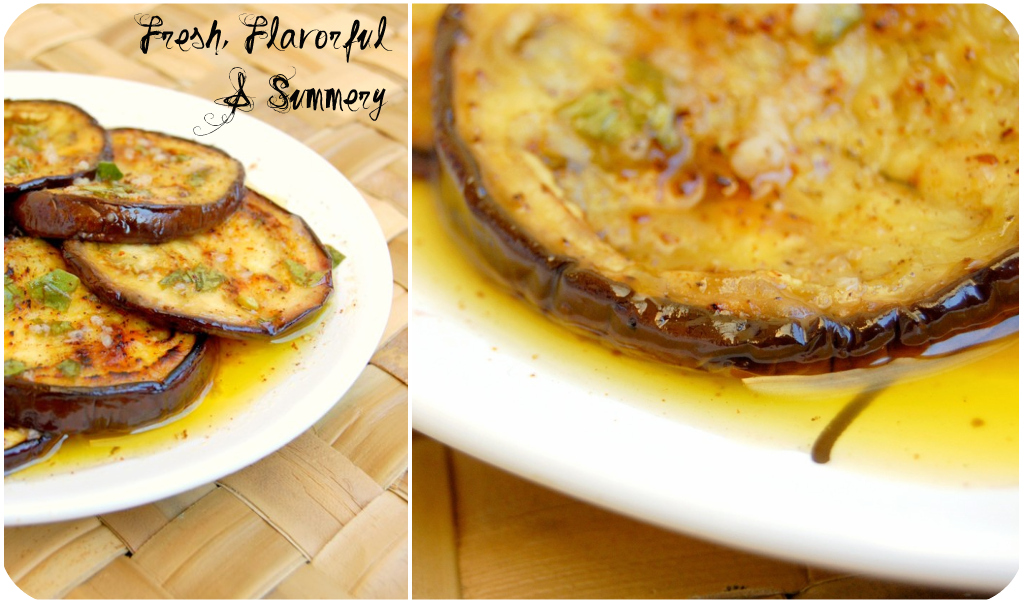
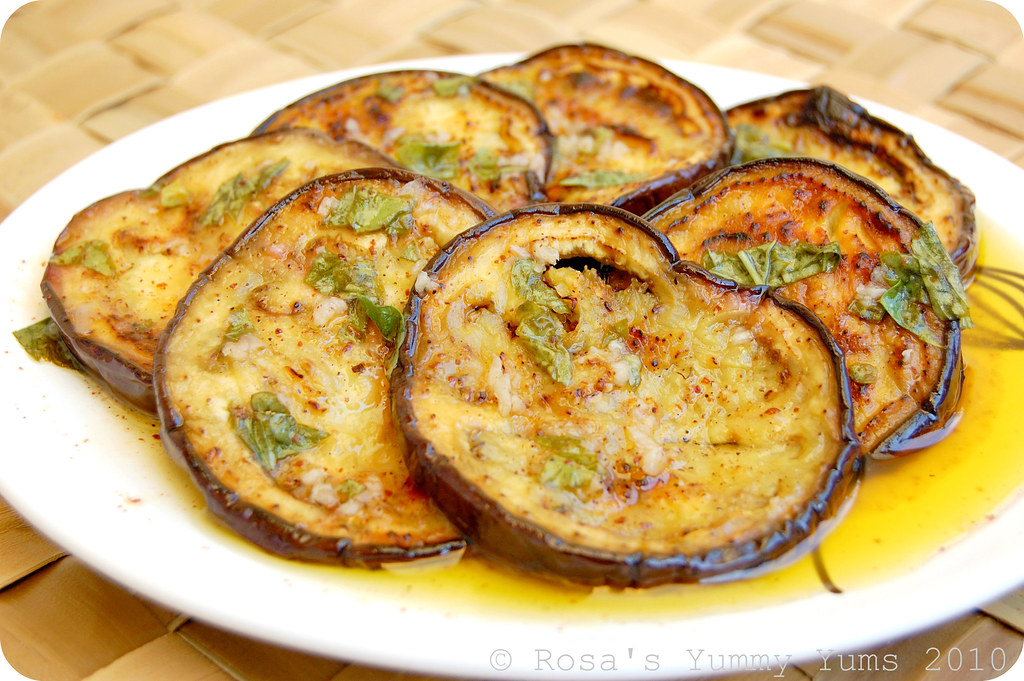
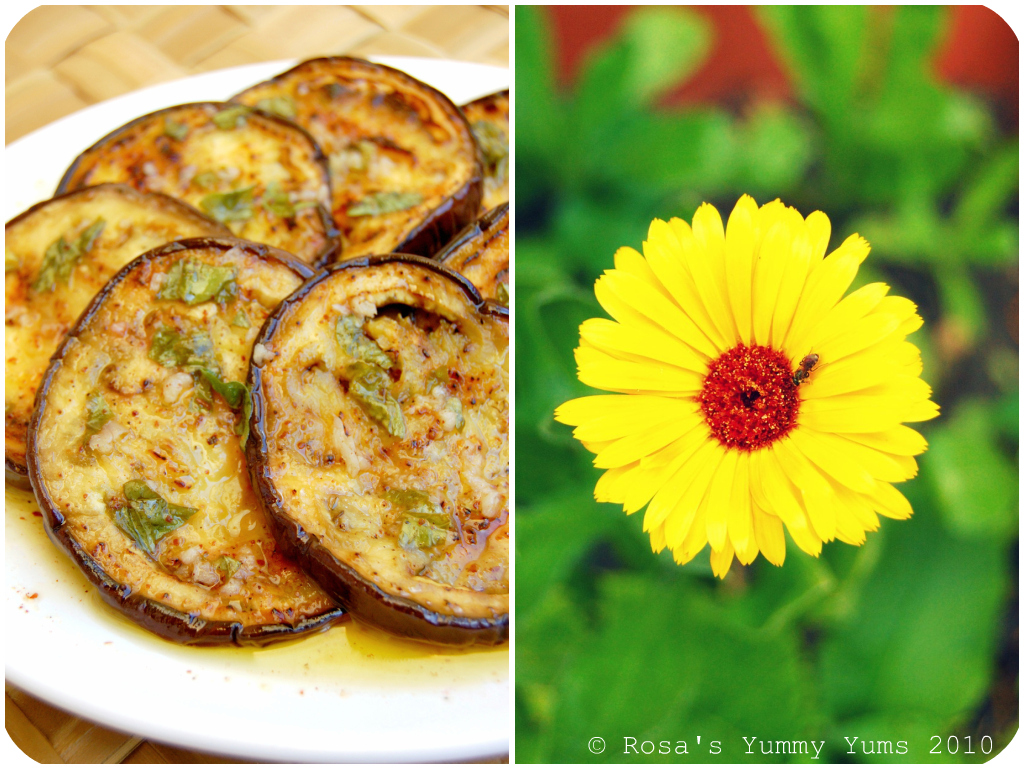
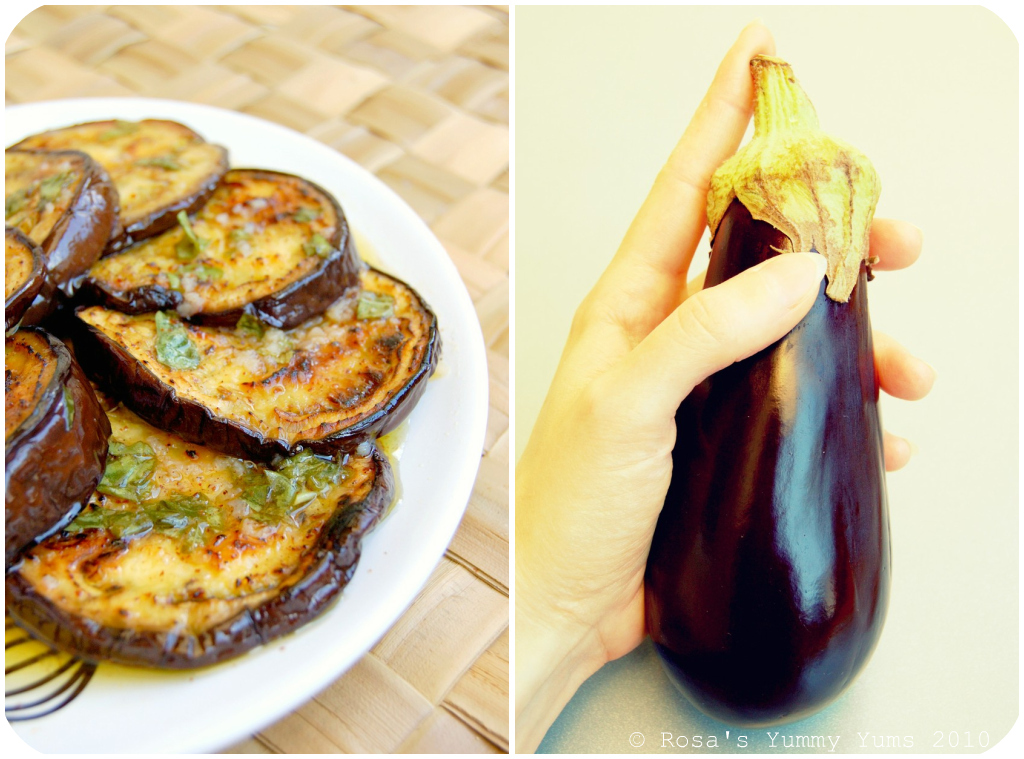
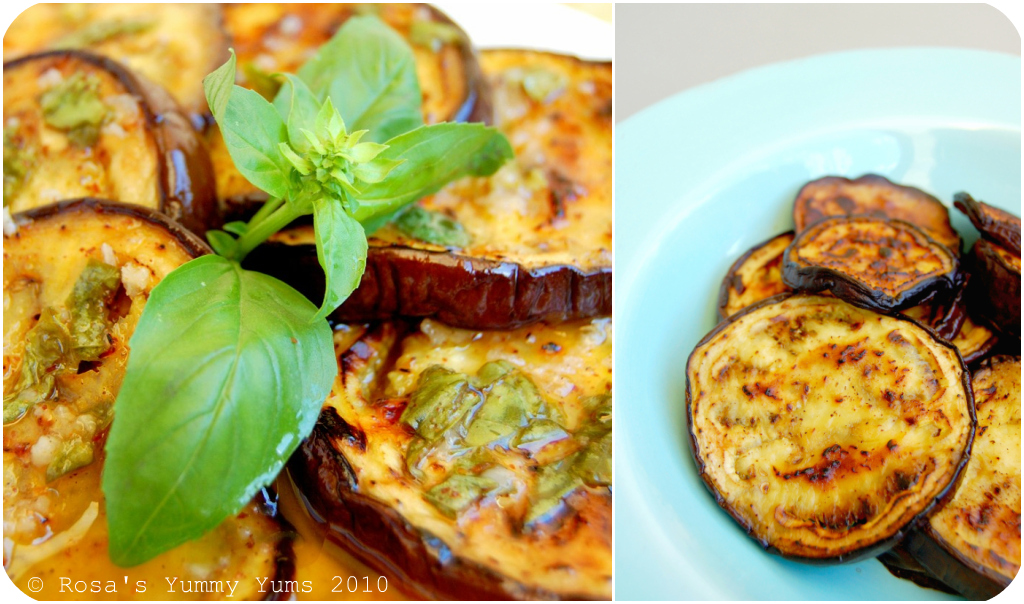
As I had some beautiful Geneva eggplants in my fridge and I wanted a cold accompaniment for my halloumi cheese, I thought that it would be a great idea to serve some kind of antipasto with it.During my childhood our table was regularly graced with many different marinaded roasted vegetable antipasti - the word antipasto means "before the meal" and is the traditional first course of a formal Italian meal - (Roasted Pumpkin & Bell Pepper Salad) and they were always very much enjoyed by my whole family. This speciality is so versatile and can be prepared in various ways. It is perfect when served as accompaniment to bread, cheese, dried meat and salad. I don't know anybody who can resist such a mouthwatering course, the ultimate symbol of summer?The recipe I am presenting today is a big home classic which I have adapted according to my culinary influences. To the original recipe I have added sumac, red tabasco, onion powder, white balsamic vinegar and smoked paprika. This results in an antipasto which is full of flavor, well-balanced and has complex aromas. Very addictive!~ Fried Eggplant Antipasto ~ Recipe by Rosa @ Rosa's Yummy Yums 2010.For 4 people.Ingredients for the "Fried Eggplant Slices":2 Medium EggplantsOlive oil, for brushing the eggplant slicesIngredients for the "Marinade":The juice of 1 organic lemon1/2 Cup Olive oil1 1/2 Tsp White balsamic vinegar
2 Cloves garlic, crushed1 Pinch Smoked paprika1/3 Tsp Sumac1 Tsp Red Tabasco1 Tbs Finely chopped Fresh basil leavesSea salt, to tasteFreshly ground pepper, to tasteMethod for the "Fried Eggplant Slices":1. Slice the eggplants into rounds.2. Sprinkle them with a little salt and leave them to rest for at least 30 minutes.3. Rinse with fresh water and pat dry with kitchen paper.4. Brush each piece (on both sides) with a little olive oil and heat a frying pan over medium high heat.5. Fry the slice until golden brown on each side.6. Transfer to a deep dish and let cool.Method for the "Marinade":7. Mix all ingredients together.8. Pour the marinade over the eggplants and make sure that all sides are covered with it.9. Put in the refrigerator for at least 2 hours and serve.
Remarks:The eggplant slices should not be mushy/mashed, therefore it is important that you don't overcook them.That antipasto can be kept (in a container) for about a week in the fridge.
Serving suggestions:Serve with bread, dried meat and cheese or on top of a green salad.
~~~~~~~~~~~~~~~~~~~~~~
~ Antipasto Aux Aubergines Grillées ~ Recette par Rosa @ Rosa's Yummy Yums 2010.Pour 4 personnes.
Ingrédients pour les "Tranches d'Aubergines Grillées":2 Aubergines moyennesHuile d'olive, pour peindre les tranches d'aubergines
Ingrédients pour la "Marinade":Le jus d'un citron bio1/2 Cup Olive oil1 1/2 CC de Vinaigre balsamique blanc
2 Gousses d'ail, écrasées
1 Pincée de Paprika fumé
1/3 CC de Sumac1/2 CC de Poudre d'oignon1 CC de Tabasco rouge1 CS de feuilles de basilic, finement hachéesSel de mer, selon goûtPoivre noir moulu, selon goûtMéthode pour les "Tranches d'Aubergines Grillées":1. Couper les aubergines en tranches.2. Les saupoudrer avec un peu de sel et les laisser dégorger pendant 30 minutes.3. Les rinser à l'eau fraîche et les tamponner avec du papier de cuisine.4. Avec un pinceau les enduire d'huile d'olive (sur les deux côtés) et faire chauffer une poêle à feu moyennement haut.5. Frire les tranches d'aubergine jusqu'à ce que chaque côté soit joliment doré.6. Mettre les tranches d'aubergines dans une assiette à soupe et les laisser refroidir.
Méthode pour la "Marinade":7. Mélanger tous les ingrédients pour la marinade.8. Verser la marinade sur les tranches d'aubergines afin qu'elles soient recouvertes de marinade de tous les côtés.
9. Les mettre au frigo pendant en tout cas 2 heures, puis servir.Remarques:
les tranches d'aubergines ne doivent pas se défaire et être trop molles. C'est pour cette raison que les aubergines ne doivent pas être trop cuites.
Cet antipasto doit être conservé au frigo (dans une boîte hermétique) jusqu'à une semaine.
Idées de présentation:Servir avec du pain, des charcuteries et du fromage ou décorer une salade verte avec.
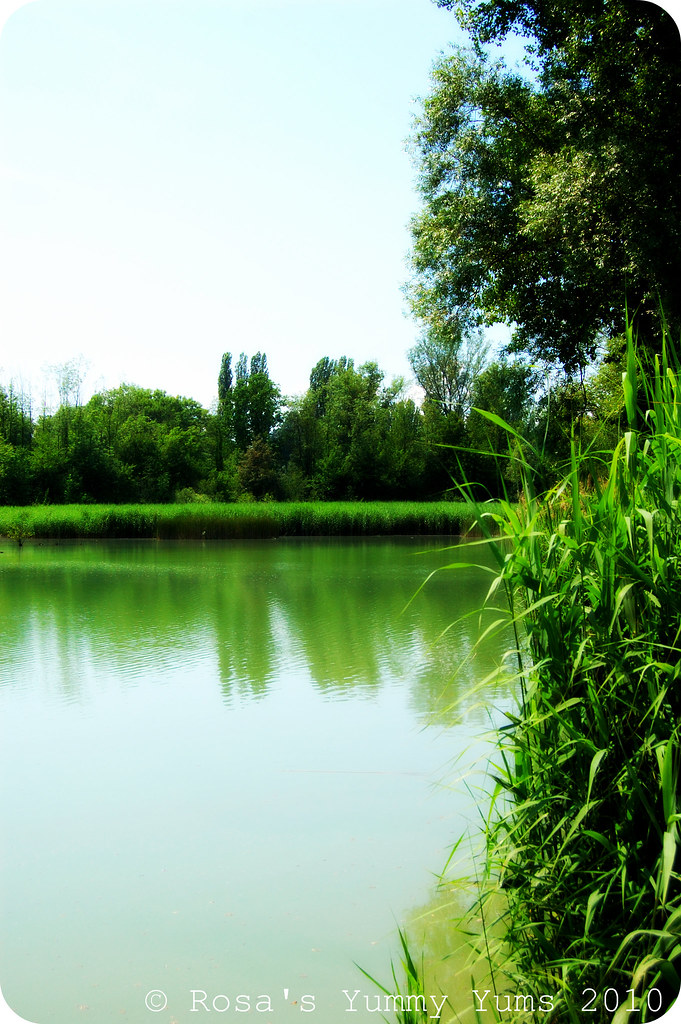
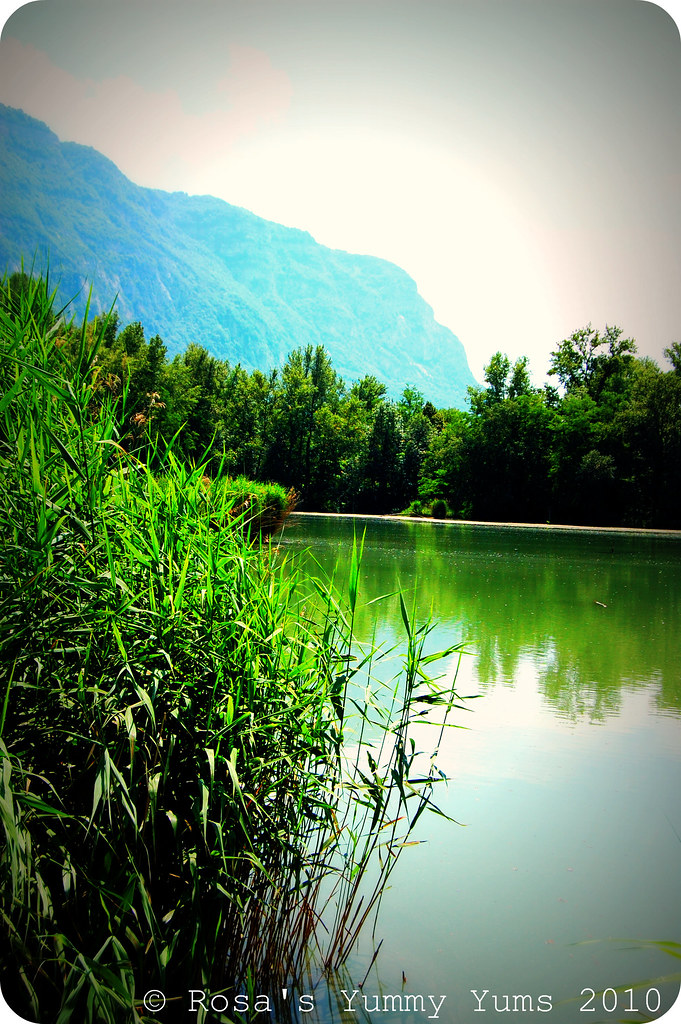
After having blogged about my trip to Zweisimmen for 6 weeks it is now time to take a tour around our beautiful Geneva countryside again. It is such a wonderful area that I never get tired of it...
Every Saturday we go out for walks or a bicycle ride around Veyrier and it's surroundings. We always do it with much pleasure. It is to be said that here, in Geneva, we are blessed with amazing landscapes made of soft green hills, sinuous rivers (Rhône, Arve, Allondon, Versoix, etc...), verdant vineyards, quaint and charming villages with old houses, fortified castles and enchanted forests with the mountains in the background (Jura, Salève, Voirons, Môle, Vuache, Alps/Mont Blanc, etc...). Ideal for romantic souls and photography addicts.
So, let me take you down to the Arve and the Etrembière pond (biotope) in France that are situated less than 10 minutes away from my house. I hope you'll like my pictures!